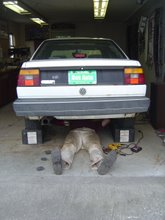
While I was working on the Saturn this evening I had a thought. Auto repair manuals are amusingly vague and should be revamped in order to offer more detailed step-by-step directions. The following section from the Haynes manual for the 1991 through 1999 Saturn illustrates the problem well:
1) Loosen the front wheel lug nuts. Raise the vehicle and support it securely on jack stands. Remove the front wheels.
2) Remove the cotter pin from the control arm-to-steering knuckle balljoint nut, loosen the nut and knock the stud loose by rapping sharply on the knuckle with a hammer. Remove the nut.
At first it sounds easy, logical and straight forward. Do not be deceived. Below I have prepared my own version of the same procedure. I believe once you have read my improved step-by-step you will appreciate the complexity of the problem.
1) Loosen the front wheel lug nuts. (socket size: 19mm) Raise the vehicle and support it securely on jack stands. (The frame rails are sturdy and excellent for jacking) Remove the front wheels. Inspect the fasteners that will be removed during the following procedure and liberally apply a penetrating oil to any that appear to be rusted. Continue to reapply the penetrating oil to the fasteners as necessary.
2) Remove the cotter pin from the castle nut that fastens the balljoint shaft to the knuckle on the backside of the hub. To do this, use a pair of diagonal cutters (AKA dikes) and start by straightening the bent ends of the pin so that they line up with the hole. Then grasp the loop of the pin with the dikes and pry the pin back and out of the hole. As the pin is released you will need to change the position of the dikes to keep the proper leverage. Also, you may be able to loosen the pin by slipping a small Phillips screwdriver or nail into the loop in order to pry the pin free. You may need to employ a hammer or pair of pliers to do this. If the cotter pin is rusted it will break, leaving you with no loop to grasp and no good way to remove the remains of the pin. Unfortunately, the shards, unless removed, will prevent the castle nut from being loosened. If this happens you will need to swear loudly and take a coffee break. Upon returning to the job, use a pair of needle-nose pliers to pull out the shards of the pin. If this does not release the pin, attempt to punch it out with a hammer and nail. Alternate this method with the pliers until the cotter pin shards are removed.
3) Before loosening the castle nut apply penetrating oil and allow time for it take effect. This is a good time to have a beer or call your mom to tell her how much you love her. Attempt to loosen the castle nut with an open wrench sized 19mm. If you are lucky, the nut will jerk loose sending the wrench and your knuckles into the axle. Stop crying, wipe the blood from your knuckles and get back to work. It’s only a flesh wound. If the castle nut does not loosen apply heat using a propane torch or similar device. Use heat liberally. If using a propane torch you will want to allow a good amount of time for proper heating. A good measure of duration for this procedure would be seven minutes or the playing time of the Beetle’s song “Hey Jude”. When heating the nut make sure not to damage the nearby rubber CV joint boot or you will want to call your mom again. You may need to heat the nut several times before you are able to break it loose. If after several attempts the nut still does not want to loosen you may need to go to the gym. If your arms are not strong enough to free the nut use your foot to push on the wrench. Hopefully, you don’t have spindle legs.
4) Once the nut is loose, free the ball joint stud. Use a pry bar or pitman arm remover to lever the ball joint away from the knuckle. You may need to rock the spindle or rap the knuckle with a hammer while doing this. If you intend to reuse the ball joint, make sure not to damage its rubber boot during the above procedure.
5) Once the balljoint shaft is loose, remove the castle nut. By now, the beer you had earlier will have made its way to your bladder. Take five to relieve yourself.
skip to main |
skip to sidebar
Hard at work/play
Street Photography
sevencardan
Hard at work/play
About Me
- sevencardan
- St Albans, Vermont, United States
- -- Existential Garage Monkey -- "Someday my destruction shall be complete. . ."
No comments:
Post a Comment